Targets
Note about BayBE
Catalyst uses BayBE under the hood. BayBE may evolve over time. This page explains parameters in non-technical terms as they are used in Catalyst today. For the detailed technical reference that Catalyst is aligned with, see the BayBE 0.13.2
Experiments in Catalyst use targets to describe what "good" looks like. A target is the outcome you measure after each trial (for example: yield, impurity, viscosity, cycle time). BayBE learns from your trials and can recommend what to run next.
Where you see targets in Catalyst
In the Create Experiment wizard, targets are configured in the Target step.
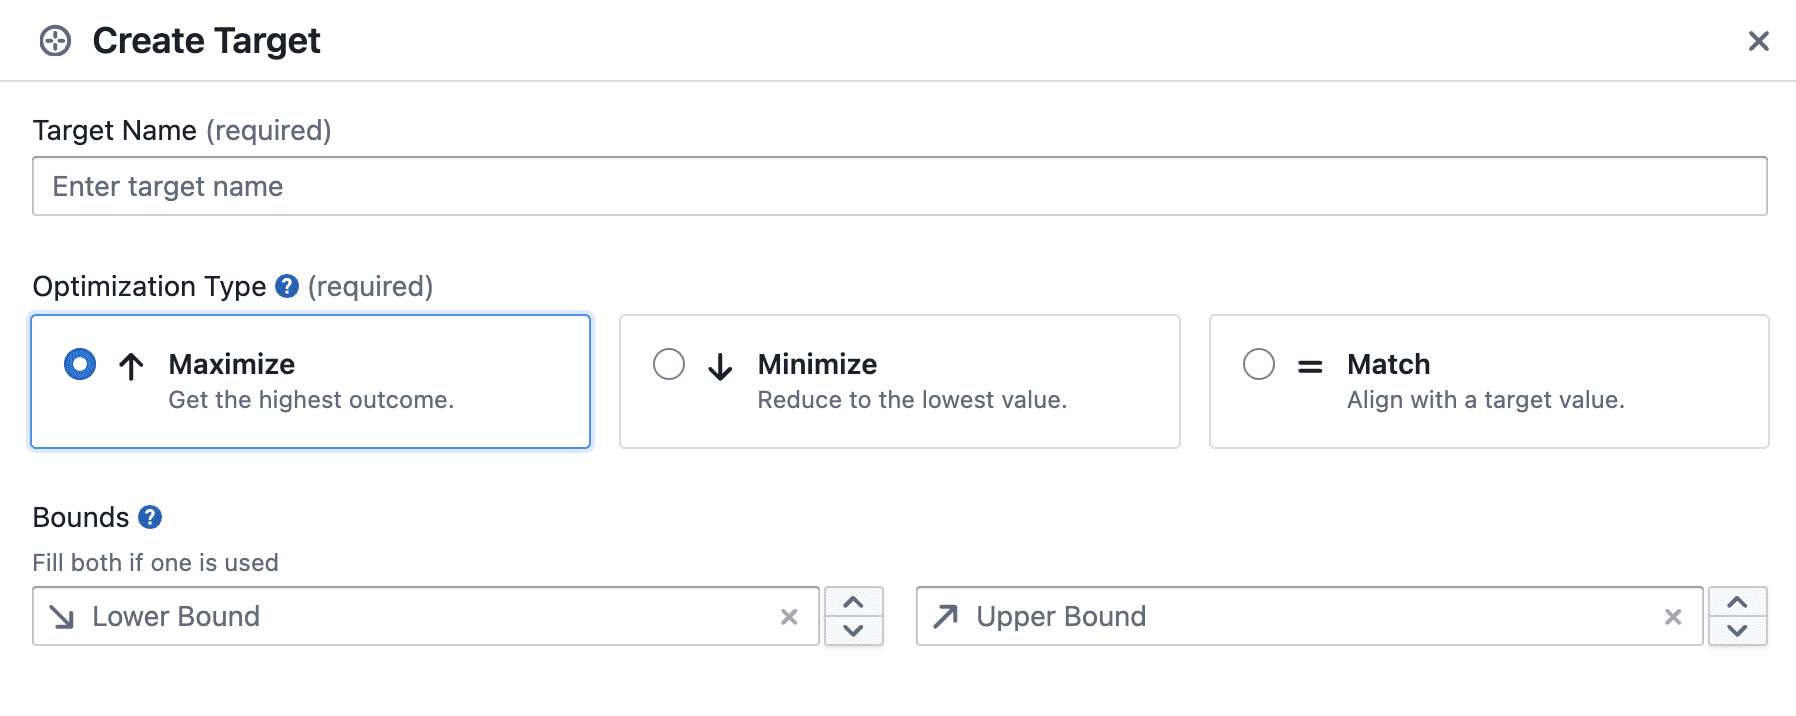
In this step you typically:
- Add one or more targets (what you will measure per trial)
- Choose the optimization type for each target (maximize / minimize / match)
- Optionally set an acceptable range (lower and upper) for a target
- (If your UI supports it) choose how multiple targets are combined into one overall goal (objective/scalarization)
What makes the Target step "invalid"
Your UI should block progress when:
- No targets are defined
- Any target has validation errors
- Any target has an acceptable range where lower ≥ upper (lower must be strictly less than upper)
This keeps the optimization problem well-defined.
What is a target?
A target is an output you care about. It could be something you want to:
- Maximize (bigger is better)
- Minimize (smaller is better)
- Match a value (best is "close to a desired value") — BayBE supports target matching.
Everyday analogy (for intuition)
If you are baking a cake, targets might be:
- Taste score from tasters — maximize
- Moisture level — maximize
- Baking time — minimize, but only as long as the cake is baked through
For coffee, targets might be:
- Bitterness score — minimize
- Strength — match a preferred value (e.g. "around 7/10")
These analogies map directly to more realistic process targets like yield, impurity, and viscosity.
Practical examples
For a reaction or process experiment, targets might include:
- Yield (%) — maximize
- Impurity (ppm) — minimize
- Viscosity (Pa·s) — match a preferred operating value (stay near a target range)
You can:
- Choose one main target (for example, maximize yield), or
- Combine several targets into a single overall score (for example, a "desirability" / scalarization approach), or
- Look at trade-offs (Pareto-style) where your workflow supports it.
Optimization Type
The optimization type tells the system which direction of your measured outcome is considered "better". You set this per target when filling in the form.
There are three options:
Maximize — Higher values are better. Use this when you want as much of something as possible.
Example: Yield (%) — you want the reaction to produce as much product as possible.
Minimize — Lower values are better. Use this when you want as little of something as possible.
Example: Impurity (ppm) ��— you want as few impurities as possible.
Match — A specific target value is best; values further away from it are worse. Use this when you have a desired set point.
Example: Viscosity (Pa·s) — your process runs best at 50 Pa·s. Values too high or too low are both undesirable. Set an acceptable range of 45–55 so that 50 (the midpoint) is treated as optimal, with quality falling off on either side.
In Match mode, an acceptable range is required — it defines both the optimal midpoint and how quickly quality degrades away from it.
Use Minimize when there is no lower limit (e.g. zero impurity is always better). Use Match when there is a sweet spot — too little is just as bad as too much (e.g. a pH or viscosity that must stay within a narrow window).
Acceptable Range
The acceptable range defines the expected or meaningful range of a target's measured values. It is optional for Maximize and Minimize targets, but required for Match targets.
The acceptable range serves two purposes:
- Putting targets on the same scale — When combining multiple targets (e.g. yield and impurity together), the acceptable range allows the system to fairly compare them. If you are using multiple targets, all of them must have an acceptable range set.
- Defining what "good" looks like — For Match targets, the range defines the ideal midpoint and how wide the acceptable window is. For Maximize/Minimize targets, it defines where the quality score starts to plateau.
Validation rule: If both values are set, the lower must be strictly less than the upper.
Examples by optimization type
| Target | Mode | Lower | Upper | Interpretation |
|---|---|---|---|---|
| Yield (%) | Maximize | 0 | 100 | Values near 100 are best |
| Impurity (ppm) | Minimize | 0 | 500 | Values near 0 are best; above 500 is worst-case |
| Viscosity (Pa·s) | Match | 45 | 55 | 50 Pa·s is optimal; deviations in either direction are penalized |
| pH | Match | 6.5 | 7.5 | pH 7.0 is the target; both too acidic and too basic are penalized |
When to leave the acceptable range empty
For simple single-target experiments with Maximize or Minimize, the acceptable range is optional. The system can still optimize without it.
However, the acceptable range becomes important when:
- You are using multiple targets combined into a single score — all targets must have an acceptable range set
- You want more control over how quality is scored across the range of possible values
One target vs multiple targets
Single target (most common)
You pick one main outcome (e.g., "maximize yield"). This is the simplest setup.
Multiple targets
Sometimes you care about multiple outcomes (e.g., maximize yield and minimize impurity, while keeping viscosity in a range).
User-friendly ways to think about it:
- Trade-off view (Pareto): compare options that represent different trade-offs
- Combine targets into one overall score (often called "desirability" / scalarization)
BayBE supports multi-target approaches such as desirability scalarization and Pareto optimization.
Acceptable Range (optional) vs constraints (don’t confuse them)
- The target’s acceptable range describes a valid/expected range for the measured outcome or helps define how "good" is computed (for example, what "too low" or "too high" means).
- Constraints restrict which parameter combinations are allowed.
If you allow an acceptable range in the UI:
- If both are set: lower < upper (strict)
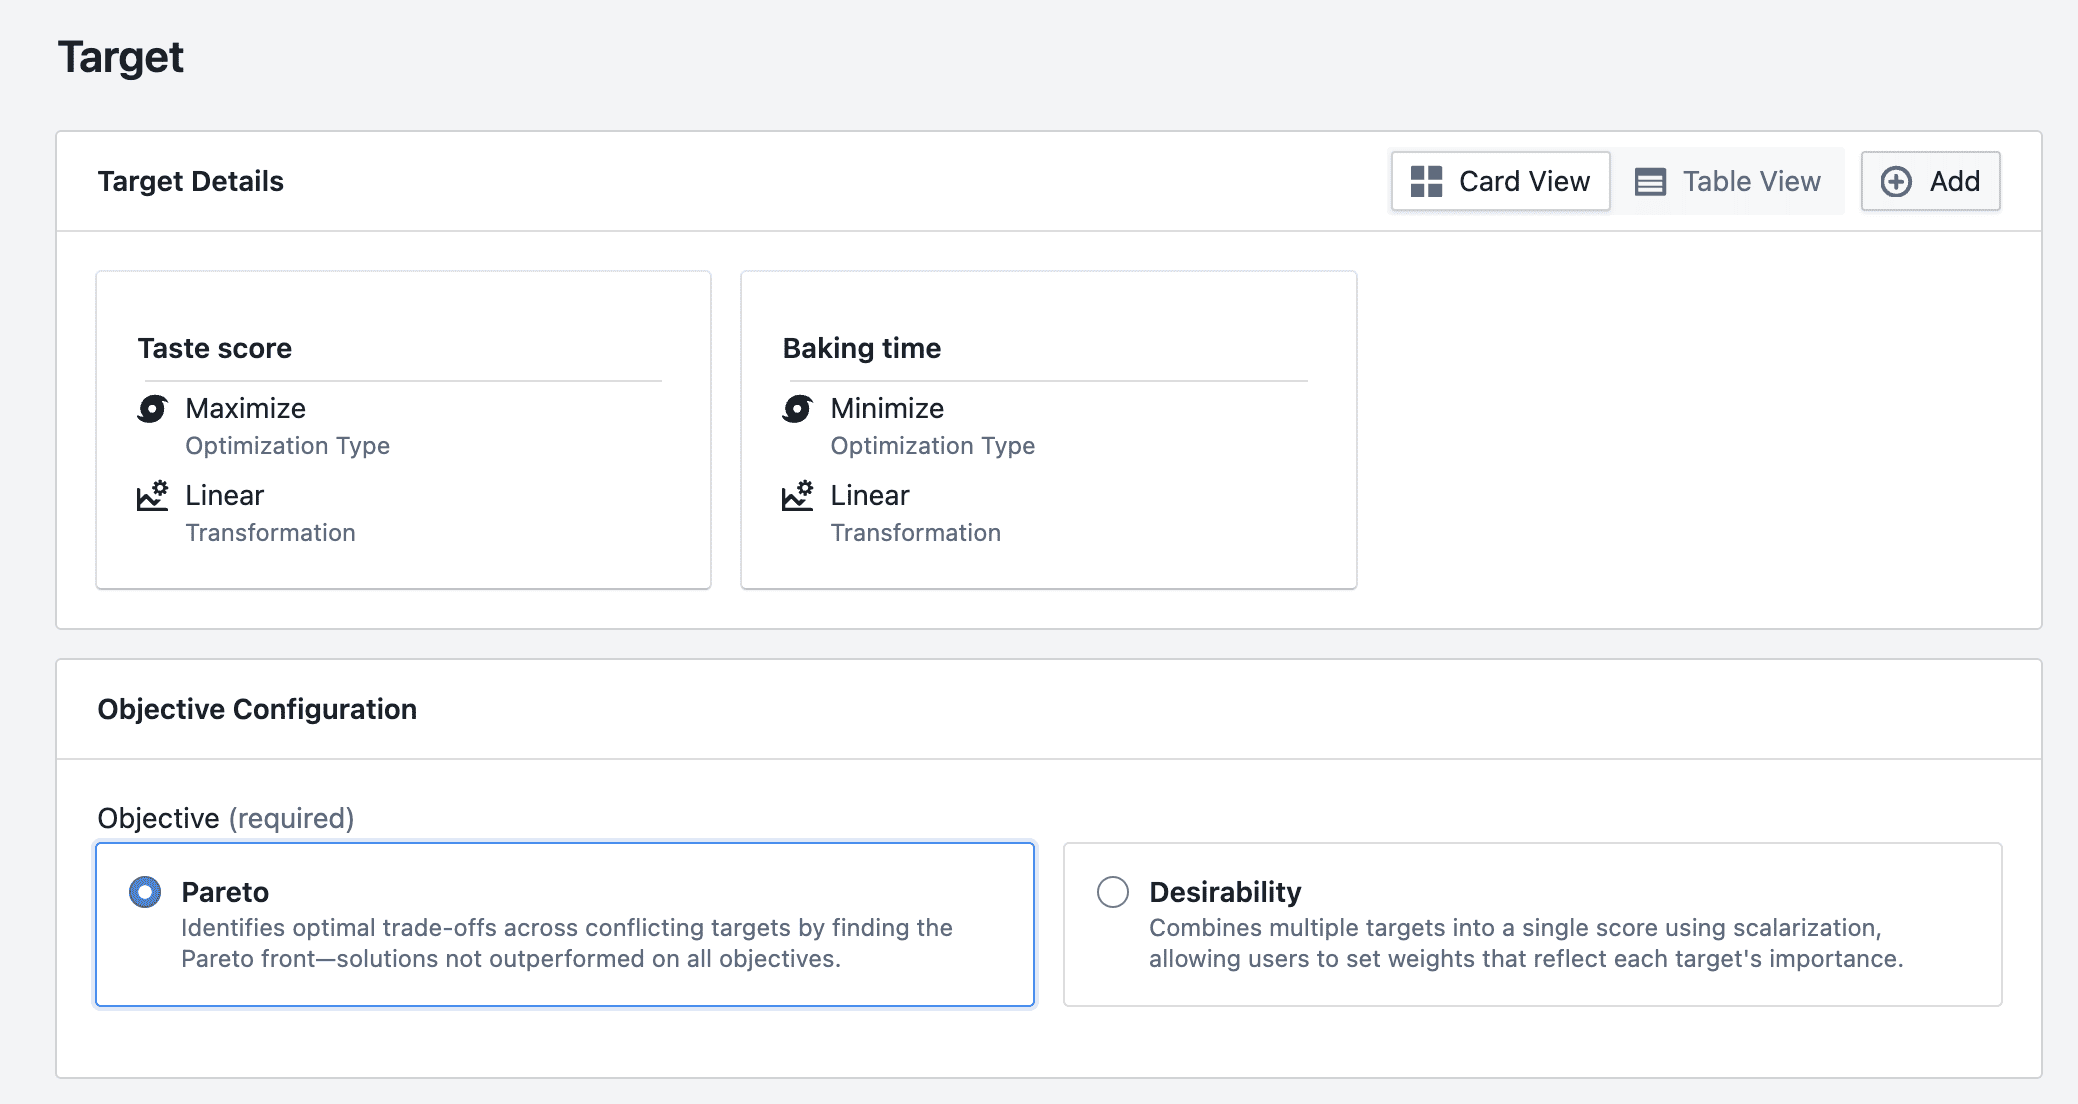
Objective Configuration
When you have more than one target, you need to tell the system how to handle them together. This is called the objective — it decides how your targets are combined or compared when generating recommendations.
There are two approaches:
Desirability — All targets are combined into a single overall score. The system then finds trials that score highest overall. Use this when you already have a sense of how to balance your targets against each other.
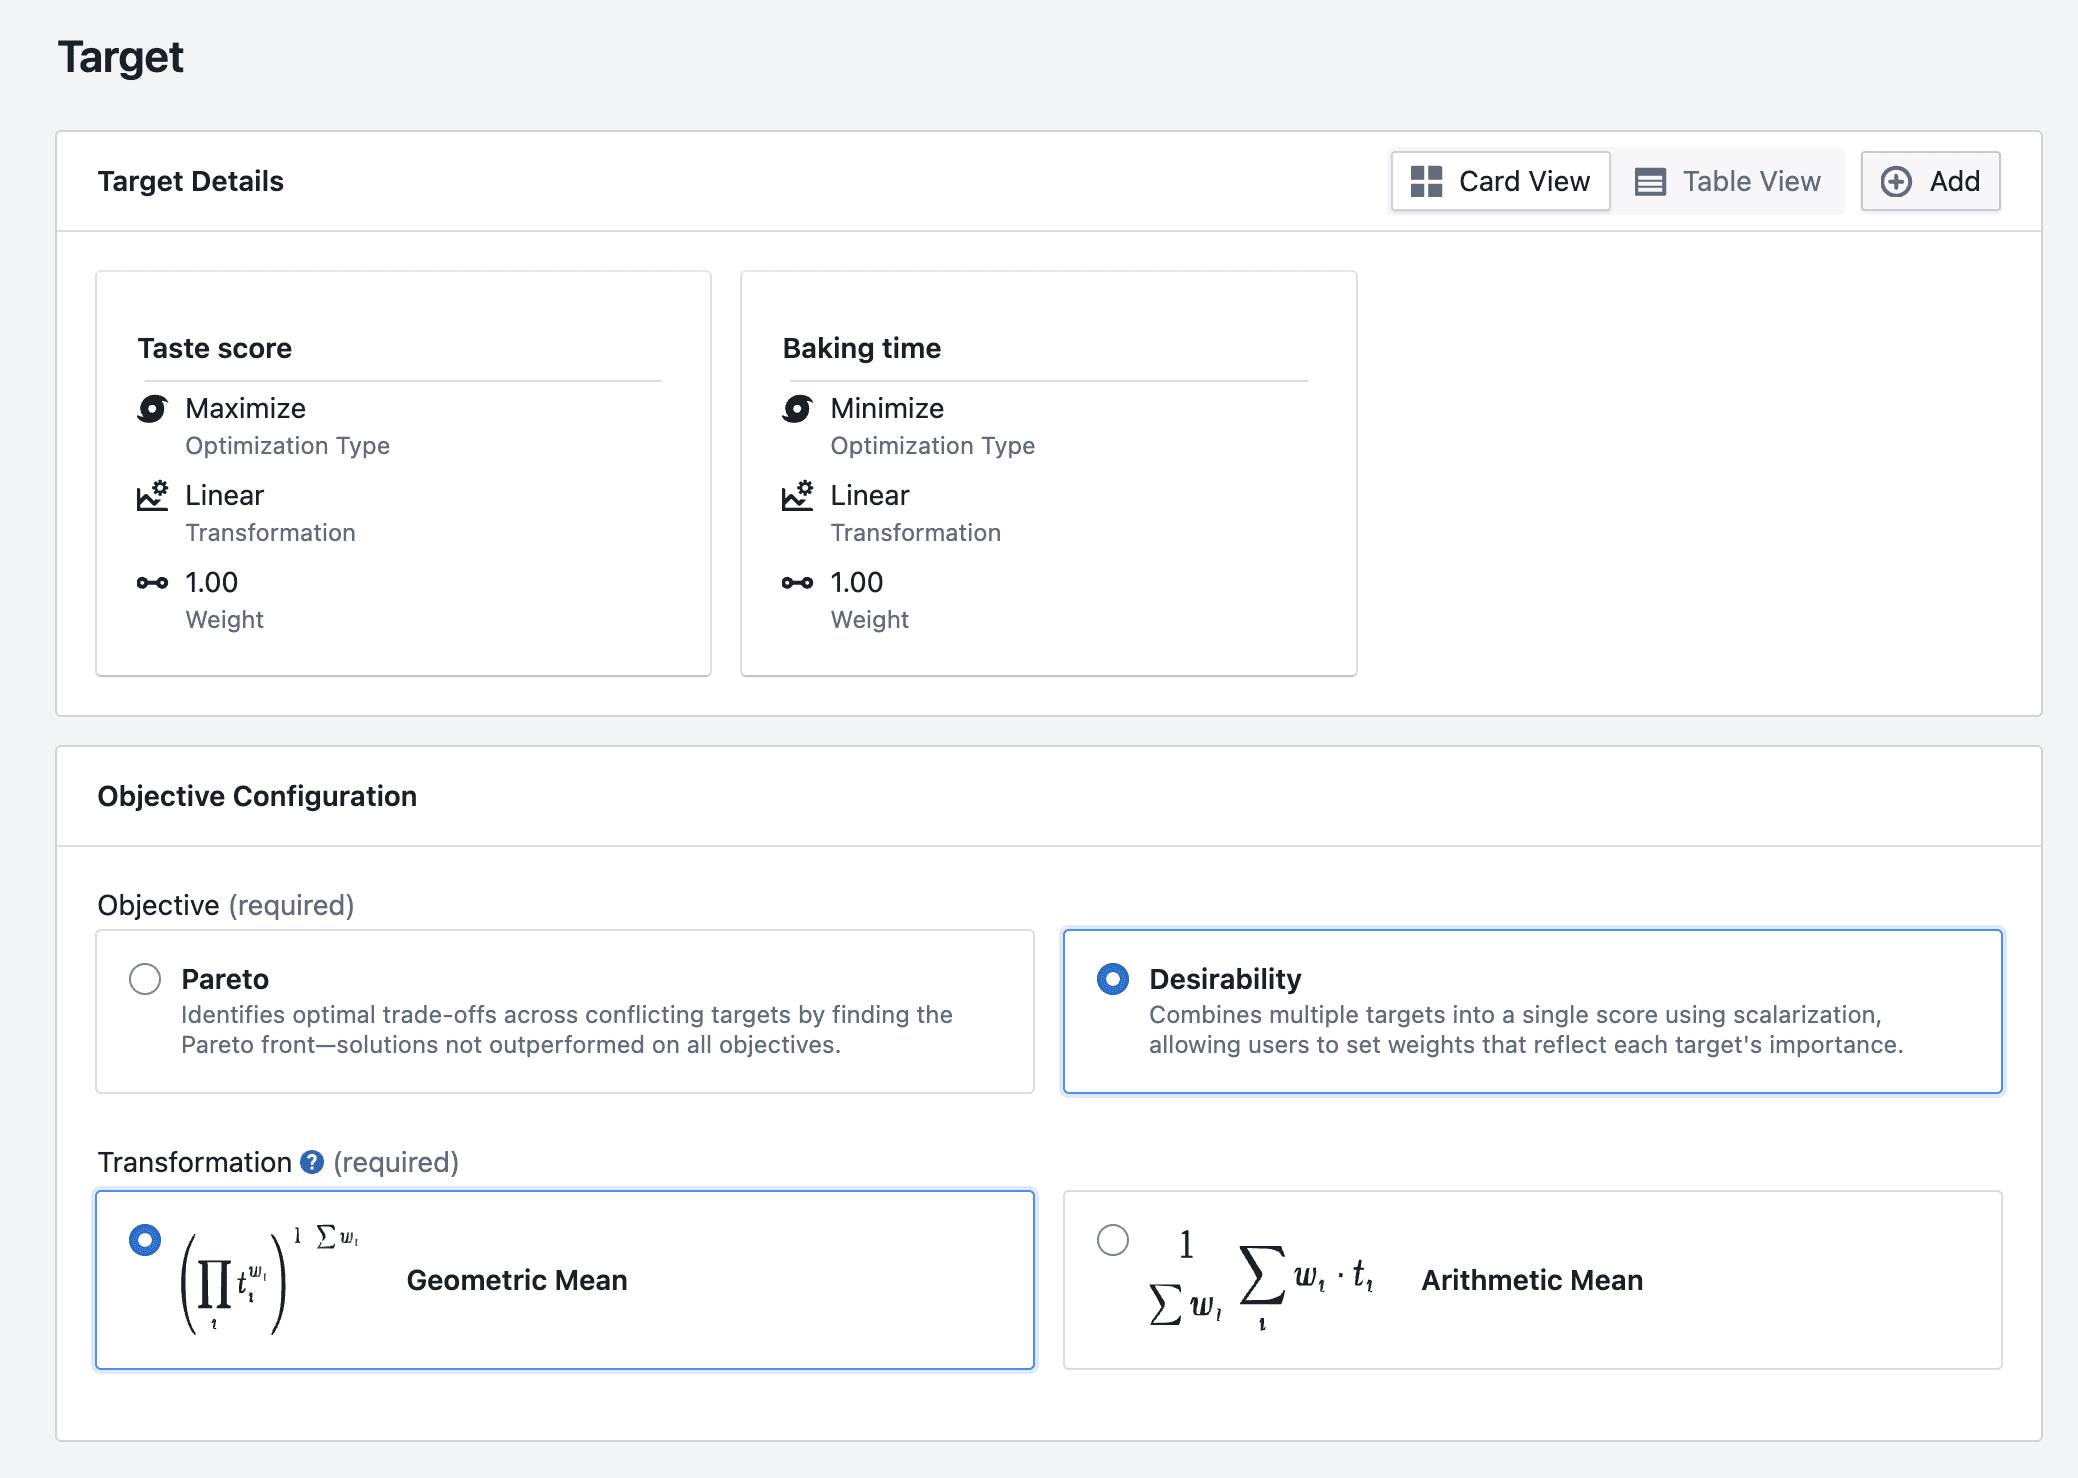
You can assign a weight to each target to reflect how important it is. A target with weight 2 counts twice as much as one with weight 1. If you leave all weights the same, all targets are treated as equally important.
Example: You have three targets — maximize yield, minimize impurity, and match viscosity. Yield matters most to you, so you give it a weight of 2 and the others a weight of 1. The system blends all three into one score and recommends the best trials based on that.
Note: When using Desirability, all targets must have an acceptable range set so the system can fairly compare them.
Pareto — Instead of picking one winner, the system shows you a range of trials that each represent a different trade-off. Use this when you are not sure yet how to balance your targets and want to see your options first.
Example: You want to maximize yield and minimize cost, but improving one tends to hurt the other. Pareto gives you options like "high yield but higher cost" vs "lower yield but lower cost" — and you choose what works best for your situation.
Use Desirability if you know what matters most and want one clear recommendation. Use Pareto if you want to explore your options and decide on the trade-off after seeing the results.
Transformation and Scalarizer
The form has two related concepts: Target Transformation, which applies per target, and the Scalarizer, which appears at the objective level when using Desirability.
Target Transformation
Target transformation appears when you set an acceptable range on a Match target. It controls how quickly quality drops off as measured values move away from your ideal midpoint.
Triangular — Quality peaks sharply at the midpoint and falls off steeply on either side. Use this when you have a strict acceptable window and values outside it are simply not good enough.
Example: Viscosity must stay close to 50 Pa·s. Anything outside 45–55 is considered a failure.
Bell — Quality peaks at the midpoint but fades out more gently. Use this when some deviation from the ideal is acceptable and you don't want near-miss results to be penalised too harshly.
Example: pH should be around 7.0, but 6.8 or 7.2 is still considered pretty good. The further from 7.0, the worse — but it tapers off smoothly rather than cutting off sharply.
Use Triangular if you have a hard window. Use Bell if you can tolerate some drift from your ideal value.
Scalarizer
The Scalarizer appears when you select Desirability as your objective. It controls how all the individual target scores are blended into one final overall score.
Arithmetic Mean — Scores are simply averaged. A weak result on one target can be balanced out by strong results on the others.
Example: Yield scores 0.9, impurity scores 0.3. Overall score is 0.6. The strong yield helps make up for the poor impurity.
Geometric Mean — Scores are multiplied together. A weak result on any one target drags the overall score down more noticeably, even if everything else looks good.
Example: Yield scores 0.9, impurity scores 0.3. Overall score drops to around 0.52. The poor impurity has a bigger impact and cannot be easily masked by the others.
Use Arithmetic Mean if it is okay for one strong target to make up for a weaker one. Use Geometric Mean if you want all targets doing reasonably well — no single bad result should be hidden by the others.
Targets and noise
Real measurements are noisy. BayBE is designed to handle variation across trials.
If your process is very noisy:
- Run replicates (same parameters multiple times)
- Record the average (and optionally variability) as the target value
Practical tips
- Choose targets that truly represent success (for example, final yield, not an intermediate proxy, unless that proxy is what you actually care about).
- Keep target definitions consistent during an experiment; if the measurement method changes, consider starting a new experiment.
- Record units and calculation method (e.g., "purity by HPLC, % area").
Further reading
- BayBE Targets: https://emdgroup.github.io/baybe/0.13.2/userguide/targets.html
- BayBE Objectives: https://emdgroup.github.io/baybe/0.13.2/userguide/objectives.html